AlphaRapid admin: configure AI provider & model
Platform administration steps; clinic clients should ask AlphaRapid to complete this setup.
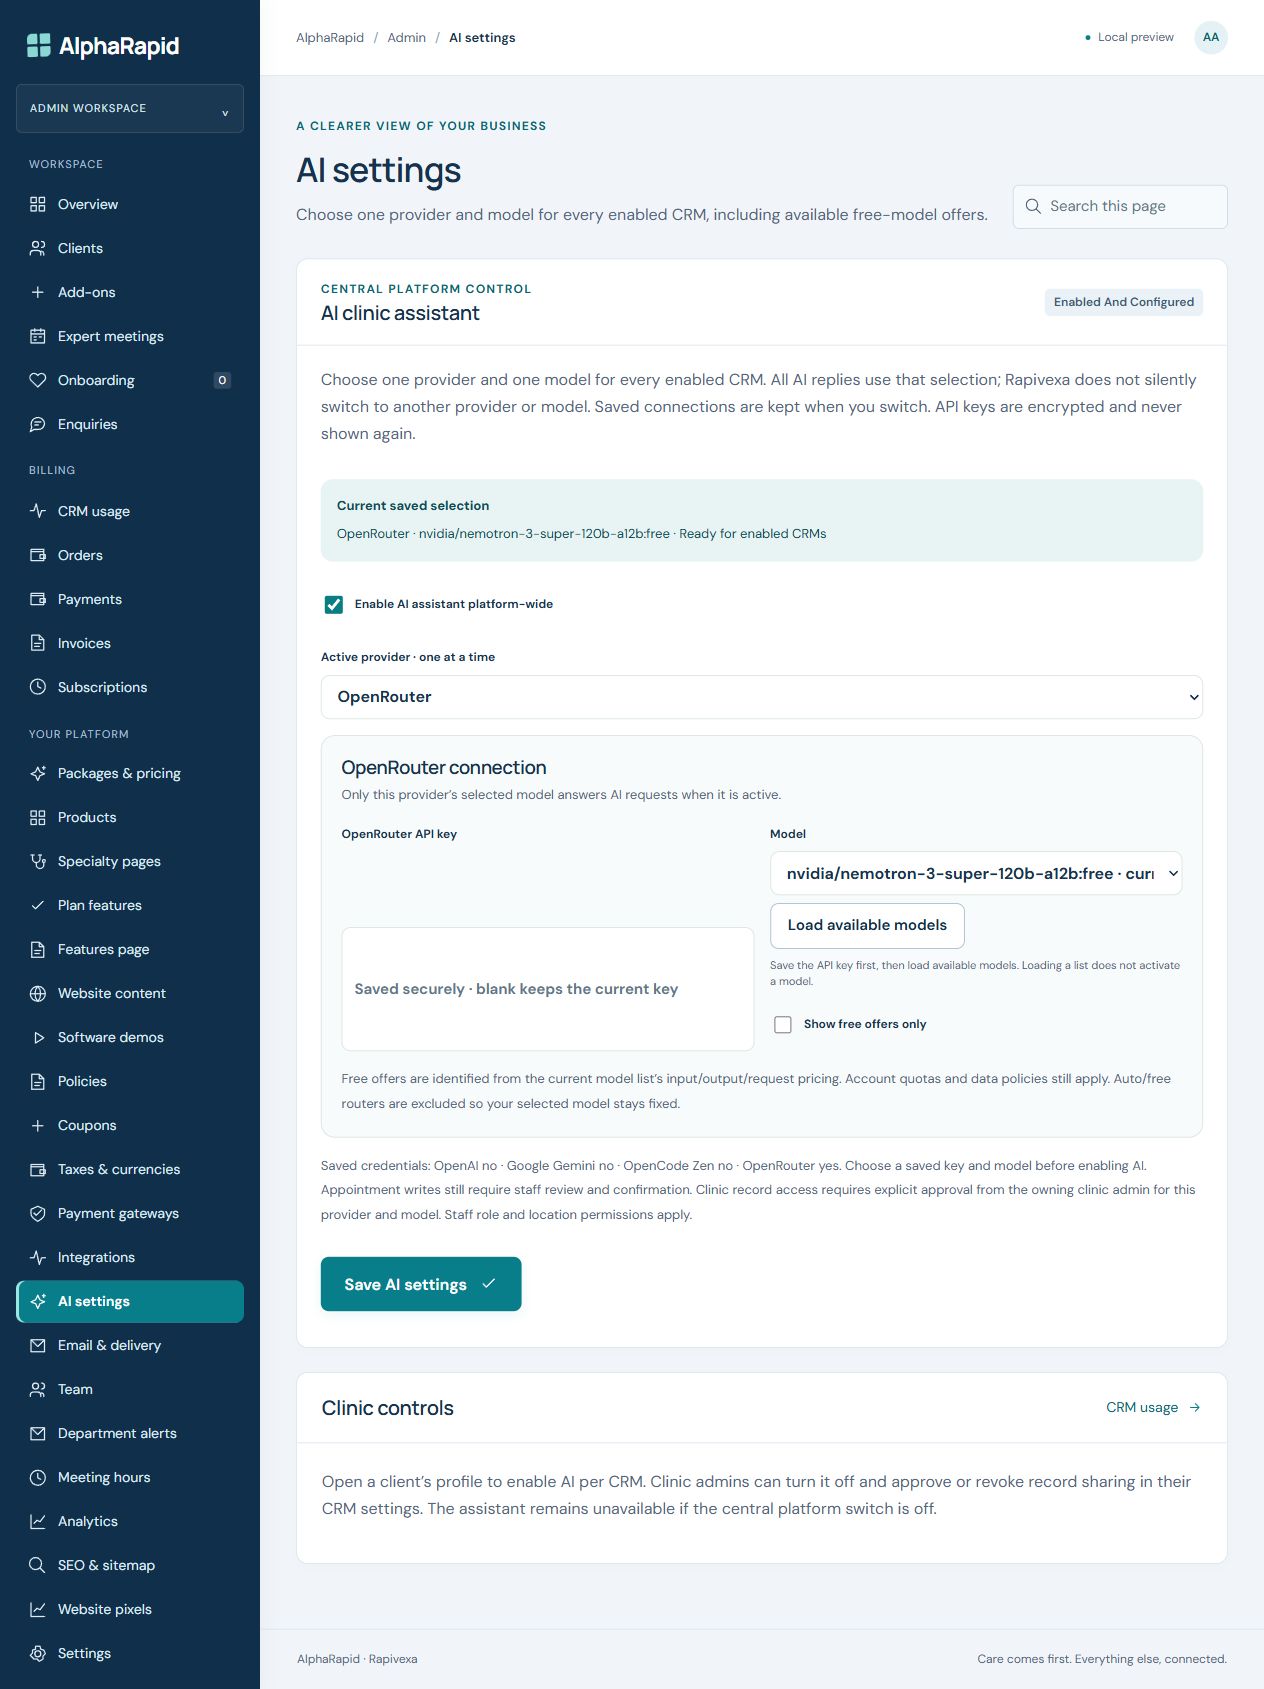
Step by step
- Only the AlphaRapid billing administrator opens Admin → AI settings.
- Choose one Active provider. Enter that provider API key and save it securely. Blank key fields keep the saved key. Never publish keys in screenshots, chat or clinic documents.
- Load available models, select a model and press Save AI settings. Loading the list alone does not activate a model. Free offers may have account quotas and their own data-use terms.
- Tick Enable AI assistant platform-wide and save. Verify the saved selection is Enabled and Configured. One selected provider/model serves enabled clinics; no silent fallback is used.
- Open Admin → Clients → the client profile → Client CRM access. Enable AI for the intended CRM. The clinic admin then follows the clinic-settings guide to enable chat and approve permitted record sharing.
- After changing provider or model, ask clinic admins to review and renew record-sharing approval. Disabling the platform switch makes the assistant unavailable across clinics.
Keep in mind
This is platform-admin guidance, not a clinic-client configuration task. Saved API keys are encrypted and not displayed. This guide does not connect a provider or change access automatically.
Related guides
Clinic & team
Enable AI: clinic settings & record-sharing approval
A clinic-admin setup guide with the exact switches and save buttons.
Read guide →Clinic & teamUse your clinic AI assistant
Register clients, prepare appointments and ask about clinic records in one chat.
Read guide →Still need help?
Send your clinic code and the exact issue. Keep passwords and patient information private.
Request setup help · Free All guides